Chủ Nhật, 31 tháng 7, 2016

BEGINNER LANDSCAPE PHOTOGRAPHERS | 5 TIPS TO HELP YOU CAPTURE EXCELLENT IMAGES

TIP 1: DON’T USE THE AUTOMATED LANDSCAPE MODE

Just don’t do it. Using landscape mode is like going to Supercuts; they’ll get the job done, but it won’t be pretty. Landscape mode typically closes down the aperture to increase depth of field, and will adjust the shutter speed to get a correct exposure. If you’re going to thrive in any photography discipline, then you’ll need to understand the Exposure Triangle and use Manual Mode to have a technical and artistic mastery over your camera and images.
landscape-mode

TIP 2: BE ADVENTUROUS

Walk around! Climb things! You need to explore your surroundings to discover the potential of the landscape you’re in. Don’t be afraid to take detours, to get close to the water, or to climb on rocks. Some of my most satisfying photos are a result of me trying new things.
5-tips-for-beginner-landscape-photographers-2
1/400 sec, f/4, ISO 200
5-tips-for-beginner-landscape-photographers-5
1/400 sec, f/4, ISO 200

TIP 3: CHALLENGE YOUR COMPOSITION

When taking landscape photos it’s easy to simply “capture the scene” and call it a day, but where is the reward in that? You need to challenge yourself to find better and more stimulating compositions. Don’t be satisfied with an image that everyone else has shot, challenge yourself to capture an image that’s unique.
5-tips-for-beginner-landscape-photographers-9
1/100 sec, f/13, ISO 200

TIP 4: BE PATIENT

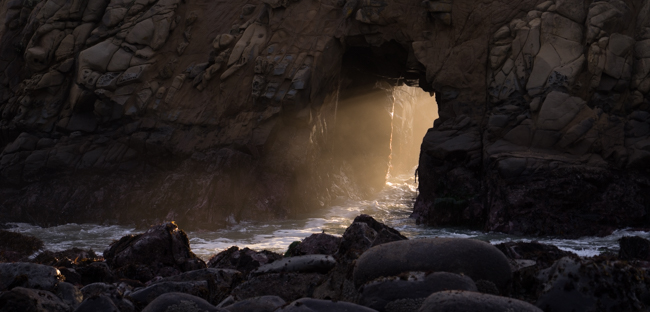
Landscape photography is unique in that you cannot simply cue the action and capture the moment; you have to wait. Sometimes this requires waking up at ungodly hours, hiking many miles, or sitting on your sandals with the crabs and clams for an hour (which I did to capture the photo above). Be patient, it’s easy to quit in the moment, but it’s well worth the the captured image in the end.
5-tips-for-beginner-landscape-photographers-4
1/400 sec, f/16, ISO 200

TIP 5: ENJOY THE PROCESS

Landscape photography can be an agonizing experience, but it’s also extremely enjoyable if you approach it the correct way. For me personally, I used to hate traveling alone and taking photos by myself. After a few times of going out alone, I began to find the entire process meditative, and I began to enjoy myself when I ventured out to take Landscape photos. As soon as I started to enjoy the process, my photos also improved significantly.
5-tips-for-beginner-landscape-photographers
1/200 sec, f/16, ISO 200

CONCLUSION AND MORE INFO

So there you have it, these are my 5 tips for any photographer who wants to start venturing into Landscape Photography territory. All the photos in this article were edited with the Lightroom Preset System v6. If you want to learn more about Landscape Photography, then check out this video!
Resource: slrlounge.com

Thứ Bảy, 30 tháng 7, 2016

100 Tips from a Professional Photographer

Here's a list of tips, advice, rules and just things to know about photography from Eric Kim, a street photographer who also holds photography workshop classes. I think the gist of it is to keep taking pictures always.
Here's the full list:
1. Just because someone has an expensive camera doesn't mean that they're a good photographer.
2. Always shoot in RAW. Always.
3. Prime lenses help you learn to be a better photographer.
4. Photo editing is an art in itself
5. The rule of thirds works 99% of the time.
6. Macro photography isn't for everybody.
7. UV filters work just as well as lens caps.
8. Go outside & shoot photos rather than spending hours a day on photography forums.
9. Capture the beauty in the mundane and you have a winning photograph.
10. Film isn't better than digital.
11. Digital isn't better than film.
12. There is no "magic" camera or lens.
13. Better lenses don't give you better photos.
14. Spend less time looking at other people's work and more time shooting your own.
15. Don't take your DSLR to parties.
16. Girls dig photographers.
17. Making your photos b/w doesn't automatically make them "artsy"
18. People will always discredit your work if you tell them you "photoshop" your images. Rather, tell them that you process them in the "digital darkroom".
19. You don't need to take a photo of everything.
20. Have at least 2 backups of all your images. Like they say in war, two is one, one is none.
21. Ditch the neck strap and get a handstrap.
22. Get closer when taking your photos, they often turn out better.
23. Be a part of a scene while taking a photo; not a voyeur.
24. Taking a photo crouched often make your photos look more interesting.
25. Worry less about technical aspects and focus more on compositional aspects of photography.
26. Tape up any logos on your camera with black gaffers tape- it brings a lot less attention to you.
27. Always underexpose by 2/3rds of a stop when shooting in broad daylight.
28. The more photos you take, the better you get.
29. Don't be afraid to take several photos of the same scene at different exposures, angles, or apertures.
30. Only show your best photos.
31. A point-and-shoot is still a camera.
32. Join an online photography forum.
33. Critique the works of others.
34. Think before you shoot.
35. A good photo shouldn't require explanation (although background information often adds to an image). *
36. Alcohol and photography do not mix well.
37. Draw inspiration from other photographers but never worship them.
38. Grain is beautiful.
39. Ditch the photo backpack and get a messenger bag. It makes getting your lenses and camera a whole lot easier.
40. Simplicity is key.
41. The definition of photography is: "painting with light." Use light in your favor.
42. Find your style of photography and stick with it.
43. Having a second monitor is the best thing ever for photo processing.
44. Silver EFEX pro is the best b/w converter.
45. Carry your camera with you everywhere. Everywhere.
46. Never let photography get in the way of enjoying life.
47. Don't pamper your camera. Use and abuse it.
48. Take straight photos.
49. Shoot with confidence.
50. Photography and juxtaposition are best friends.
51. Print out your photos big. They will make you happy.
52. Give your photos to friends.
53. Give them to strangers.
54. Don't forget to frame them.
55. Costco prints are cheap and look great.
56. Go out and take photos with (a) friend(s).
57. Join a photo club or start one for yourself.
58. Photos make great presents.
59. Taking photos of strangers is thrilling.
60. Candid>Posed.
61. Natural light is the best light.
62. 35mm (on full frame) is the best "walk-around" focal length.
63. Don't be afraid to bump up your ISO when necessary.
64. You don't need to always bring a tripod with you everywhere you go (hell, I don't even own one).
65. It is always better to underexpose than overexpose.
66. Shooting photos of homeless people in an attempt to be "artsy" is exploitation.
67. You will find the best photo opportunities in the least likely situations.
68. Photos are always more interesting with the human element included.
69. You can't "photoshop" bad images into good ones.
70. Nowadays everybody is a photographer.
71. You don't need to fly to Paris to get good photos; the best photo opportunities are in your backyard.
72. People with DSLRS who shoot portraits with their grip pointed downwards look like morons.
73. Cameras as tools, not toys.
74. In terms of composition, photography and painting aren't much different.
75. Photography isn't a hobby- it's a lifestyle.
76. Make photos, not excuses.
77. Be original in your photography. Don't try to copy the style of others.
78. The best photographs tell stories that begs the viewer for more.
79. Any cameras but black ones draw too much attention.
80. The more gear you carry around with you the less you will enjoy photography.
81. Good self-portraits are harder to take than they seem.
82. Laughter always draws out peoples' true character in a photograph.
83. Don't look suspicious when taking photos- blend in with the environment.
84. Landscape photography can become dull after a while.
85. Have fun while taking photos.
86. Never delete any of your photos.
87. Be respectful when taking photos of people or places.
88. When taking candid photos of people in the street, it is easier to use a wide-angle than a telephoto lens.
89. Travel and photography are the perfect pair.
90. Learn how to read a histogram.
91. A noisy photo is better than a blurry one.
92. Don't be afraid to take photos in the rain.
93. Learn how to enjoy the moment, rather than relentlessly trying to capture the perfect picture of it.
94. Never take photos on an empty stomach.
95. You will discover a lot about yourself through your photography.
96. Never hoard your photographic insight- share it with the world.
97. Never stop taking photos
98. Photography is more than simply taking photos, it is a philosophy of life
99. Capture the decisive moment
100. Write your own list.
Resource: gizmodo.com/

11 Tips for Beginner Photographers

1. Don’t go crazy buying the most expensive equipment right away.

It’s possible to get very nice photos with an inexpensive point and shoot. See these examples on Flickr. The more photos you take, the more you’ll know about what kind of camera to get when it’s time to upgrade.

2. Consider a tripod.

On the other hand, an inexpensive tripod is worth getting, especially if you have shaky hands like mine. When I got a tripod, my satisfaction with my shots skyrocketed. For even more stability, use your camera’s timer function with a tripod (read our introduction to tripods).

3. Keep your camera with you all the time.

Photo ops often come when you least expect it. If you can keep your equipment relatively simple – just a small camera bag and a tripod – you might be able to take advantage of some of those unexpected opportunities. Or, if your phone has a camera, use it to take “notes” on scenes you’d like to return to with your regular camera.

4. Make a list of shots you’d like to get.

For those times you can’t carry your camera around, keep a small notebook to jot down places you’d like to come back and photograph. Make sure to note any important details, like the lighting, so you can come back at the same time of day or when the weather’s right. If you don’t want to carry a notebook, send yourself an email using your cell phone with Jott.com.

5. Don’t overlook mundane subjects for photography.

You might not see anything interesting to photograph in your living room or your backyard, but try looking at familiar surroundings with fresh eyes. You might catch an interesting trick of the light or find some unexpected wildflowers in your yard. Often a simple subject makes the best shot.

6. Enjoy the learning process.

The best part of having a hobby like photography is never running out of things to learn. Inspiration is all around you. Look at everything with the eyes of a photographer and you’ll see opportunities you never noticed before.

7. Take advantage of free resources to learn.

Browse through Flickr or websites like the Digital Photography School Forum for inspiration and tips. Also, your local library probably has a wealth of books on all types of photography. If you’re interested in learning about post-processing, give free software like the GIMP a try.

8. Experiment with your camera’s settings.

Your point and shoot may be more flexible and powerful than you know. Read the manual for help deciphering all those little symbols. As you explore, try shooting your subjects with multiple settings to learn what effects you like. When you’re looking at your photos on a computer, you can check the EXIF data (usually in the file’s properties) to recall the settings you used.

9. Learn the basic rules.

The amount of information about photography online can be overwhelming. Start with a few articles on composition. Be open to what more experienced photographers have to say about technique. You have to know the rules before you can break them.

10. Take photos regularly.

Try to photograph something every day. If you can’t do that, make sure you take time to practice regularly, so you don’t forget what you’ve learned. An excellent way to motivate yourself is by doing the weekly assignments in the DPS Forum.

11. Don’t be afraid to experiment.

If you’re using a digital camera, the cost of errors is free. Go crazy – you might end up with something you like. You’ll certainly learn a lot in the process.
Resource: digital-photography-school

Thứ Sáu, 29 tháng 7, 2016

Using the Canon EOS 400D / Digital Rebel XTI DSLR - Media Technician Steve Pidd

The Canon Digital Rebel XTi/400D is a very versatile camera with a host of helpful features. You can choose to use the automatic exposure modes and basically point and shoot, or you can take more control and adjust settings yourself by using the advance exposure modes. Either way, you get great pictures!

Features of the Canon Digital Rebel XTi/400D

Your new Canon Digital Rebel XTi/400D has a host of features and the following figures point them out one by one. An asterisk indicates that a button or control has multiple functions.
Checking out the Canon XTi/400D from the photographer’s perspective.
Looking down at some of the main buttons and dials.
Finding the focus and ports on the front and side of the Canon XTi/400D.

Automatic Exposure Modes of the Canon Digital Rebel XTi/400D

The Canon Digital Rebel XTi/400D can take wonderful photographs with just a little help from you. The following table offers a quick explanation of your camera’s fully automatic exposure modes. In these modes, you can choose between automatic or manual focusing, but you have little or no control over most other picture-taking settings.
image0.jpg

Advanced Exposure Modes of the Canon Digital Rebel XTi/400D

If you want more than a point-and-shoot camera, the Canon Digital Rebel XTi/400D is for you. In automatic mode, you get the ease of having the camera determine the settings, but you can also choose the advanced exposure modes which give you more control over your camera settings. The following table shows you that you can adjust aperture (f-stop) to manipulate depth of field (the zone of sharp focus) and adjust shutter speed to determine whether moving objects appear sharply focused or blurry. In all five modes, you also can tweak color, ISO (light sensitivity), and exposure.
image0.jpg
Reseource: dummies.com

Thứ Tư, 27 tháng 7, 2016

7 TIPS ON HOW TO PHOTOGRAPH A 1 YEAR OLD

I had the pleasure to celebrate Serena’s first year of life with her and her mom, Allison
7tips

7 Tips on How to Photograph a 1 Year Old


1) HAVE THE MOM OR DAD NEAR BY.

Capture memories by having the parent in the pictures to catch how the child and the parent interact. Also, take pictures of the toddler with the parent near-by. Having the parent near, off to the side or behind the camera will help direct the toddler’s attention and help the toddler be in their comfort level. The parent is the best entertainer because they know the toddler. In the picture below the mom was off to the side waving Serena’s stuffed Tiger.
2013-04-25_0077

2) HAVE THE PARENT BRING PROPS.

Besides having an awesome mom in this photo session, the props helped a lot. The prop selection depends on the gender and the personality of the child. Here are the some ideas to get your wheels turning: mirror, favorite toys, snack, ball, balloons, flowers, hat, sunglasses, tutu, chalk sign, sidewalk chalk, glitter, books, bubbles, blanket and/or a momento.
2013-04-25_0103

3) MAKE SURE TO MOVE AROUND A LOT.

In this photo session I used a 50mm 1.4 prime lens. I wasn’t afraid to get dirty and move around a lot. Many times during this photo session I got on the toddler’s eye level. To get the toddler to face me I would change my position and quickly walk to another angle. This got the the toddler’s attention.
2013-04-25_0023

4) GIVE THE PARENT AND CHILD ACTIONS.

I directed the mom to do certain actions which allowed me to capture the raw personalities of the mom and daughter.

HERE IS A LIST OF 4 MUST-HAVE POSES FOR A MOTHER-DAUGHTER PORTRAIT SESSION:

– piggy back ride
-spin the child round-and-round
-read them a book
-tickle
2013-04-25_00542013-04-25_00122013-04-25_00852013-04-25_0086


5) FOCUS ON THEIR BABY FEATURES.

The fastest growth period is the first year of a person’s life. The chubby hands and tiny feet disappear in the blink-of-an-eye. Capture those moments: hands, feet and eyes.
2013-04-25_00632013-04-25_0065

6) CHANGE THE SCENERY.

A toddler has a short attention span so it is helpful to take breaks (a clothes change) and/or change of scenery. The picture below was taken on a boat dock. We were sweetly granted 5 minutes to take pictures on the gated docks. The perfect time period for a toddler’s attention span.
2013-04-25_0072

7) HAVE FUN. WORK ON THE CHILD’S TIME.

When you work at the child’s pace you get photos you wouldn’t normally capture. The picture below I was thinking about a pose and Serena was just being herself and wandering around.
2013-04-25_0017
Serena was getting over having her pictures taken 30 minutes into the session so I thought it was the perfect time for a wardrobe change and rest.
Going from one scene to the other, Serena insisted that she walk and climb the steps. I am glad I captured this moment. 2013-04-25_0053
This was not only my first one year old photography session but my first photography session ever (not with a close friend). It was truly a blessing to capture the interactions between a mother and daughter and Serena’s first year of life.
Resource: aprilmaura.com

10 Quick Tips to Fix Your Bad Photos

10 Photography Tips for Beginners
Digital photography has democratized the medium. More people are taking more photos than ever before, and they're sharing them online with friends and family in record numbers. It's easy to place the blame on the camera (or your smartphone) if your images aren't as nice as some others you see online, but by following a few guidelines you can improve the quality of your snapshots—without having to shell out big bucks for a new camera. Keep these 10 easy tips in mind next time you head out to capture the world around you. And if you have any tips that have helped you take better pictures, please share them in the comments section.
1. Get Basic Composition Down. The heart of a photograph is its composition—the position of different elements in a frame. The easiest rule of thumb to learn and remember is the Rule of Thirds. Basically, you'll want to break your frame into nine squares of roughly equal size. Try and align the subject of your photo along these lines and intersections and imagine the main image divided over these nine boxes. This gives you a more dramatic, visually interesting shot than one where you subject is located dead center. Many cameras have a rule of thirds grid overlay that you can activate when shooting.
Rule of Thirds
2. Adjust Exposure Compensation. As long as you aren't shooting in full manual mode, your digital camera is making decisions that determine the exposure of a photo—in English, how light or dark the shot appears. Generally speaking, a camera looks at a scene and tries to determine the appropriate exposure based on the correct lighting of a gray card, which is why there are special scene modes for snow—without them, the camera would try to make the white snow gray.
If a photo is too light or dark you can either delve through the dozens of scene modes that are available in modern point-and-shoot cameras, or simply dial in a bit of exposure compensation. Many cameras have a physical button or dial for this, identified by a +/- symbol. If your photo is too dark, move the scale up above zero; if too light, move it down a bit.
3. Choose the Right Mode. Your camera is likely to have scores of shooting modes, ranging from fully automatic operation to very specific scene modes. If you're shooting fast action you can put the camera into Shutter Priority ("S") mode and increase the speed at which a photo is taken—setting it to 1/125 second or faster will help to freeze action, and for really quick subjects (like the hummingbird below), use as short a speed as possible to freeze motion. In lower light you can use Aperture Priority ("A") mode to make sure as much light is entering the lens as possible, or if you're shooting landscapes on a tripod you can close the lens's iris to increase depth of field, keeping everything in sharp focus from the foreground to the horizon. If you're a D-SLR shooter, you're more likely to use the A or S modes, while point-and-shoot cameras will often feature more specific modes that cater to activities like sports, low-light use, or landscape shooting.
Freezing Motion With a Short Shutter Speed
4. Think About Lighting. Pay attention to how much light you have and where it's coming from when taking your photos. If you're shooting outdoors, be careful not to take photos of a person when the sun is at their back. If you're grabbing a photo in front of a monument or landmark and don't have the flexibility to adjust your position you can use the camera's flash to fill in shadows. You may have to manually activate the flash, as there's a good chance that the camera will think that it's unnecessary on a bright day.
5. Use Your Flash Wisely. Many a photo has been foiled by a flash firing too close to a subject. If your friends and family look like Casper the Friendly Ghost when you photograph them, chances are that you're too close when snapping your photos. If you need to activate the flash, back up a bit and zoom in to get the proper framing. If things are still to bright—or too dark—check and see if flash compensation is an option. Many cameras allow you to adjust the power of the flash, which can help to add better balance to your flash-assisted photos. Adding just a little bit of light makes it possible to fill in shadows, resulting in a more natural-looking photo.
6. Add a Flash Diffuser. If dialing down flash power isn't an option, you can also add a diffuser to help spread the light out. Smaller flashes aren't able spread light across a large surface area, giving your subjects a deer-in-the-headlights look. Point-and-shoot users can tape a bit of wax paper over the flash to soften its output. D-SLR users are best served by using an empty 35mm film canister—the milky variety used by Kodak—with a bit cut out so that it fits snugly over the flash. Photojojo has a tutorial that will walk you through the steps. If you don't have any film canisters lying around, try asking at your local drug store or department store minilab—they're bound to have dozens sitting in a drawer, and will gladly part with one. If making your own diffuser doesn't sound like your cup of tea, consider theGary Fong Puffer, a $22 accessory that will look a bit more professional when mounted on your camera.
White Balance
7. Watch Your White Balance. Your camera will try and set white balance automatically based on the type of light in which you're shooting. Different light casts different types of color—sunlight is very blue, tungsten lighting is yellow, and fluorescent is a bit green. In many cases, the camera will automatically detect what type of lighting you're under and adjust the color in photos so that they look natural. But when White Balance isn't right, you can get results like you see above—the image on the left is correctly balanced, and the one on the right is way off. If you're shooting under mixed lighting, or if the camera is just having a hard time figuring things out, you can set the white balance manually. On most point and shoots you'll have to dive into the shooting menu to adjust this, but many D-SLRs have a dedicated White Balance button, often labeled "WB." You can correct color in iPhoto or Picasa later on, but you'll get better-looking photos if you get the white balance right in the first place.
8. Use a Tripod or Monopod. Sometimes, the best way to get your shot perfect is to take some extra time. Using a tripod will allow you to set up framing, and can come in handy—along with your camera's self-timer—for getting that shot of you and the kids in front of Mount Rushmore. You can get away with an inexpensive tripod if you're a point-and-shoot user, although spending a bit more on a brand like Manfrotto or Gitzo will result in much less frustration than with the bargain brands that you'll find at the local five and dime. D-SLR users should definitely put care into selecting a tripod, as a set of legs and a head that are sturdy enough to hold the camera are paramount.
If you're more of a run-and-gun shooter, a monopod—which is just like it sounds, a tripod with two of its legs missing—will help you stabilize your shots. Great for use at zoos and sporting events, a monopod is supplemented by your two legs in order to add stability to your camera—without the sometimes-cumbersome setup and breakdown required with a good tripod.
9. Be Selective. It's easy to take hundreds of photos in a few hours when shooting digitally. But don't just dump your memory card and upload all of the images to Facebook. You should spend some time going through your photos so you can eliminate redundant shots and discard photos that may be out of focus or poorly composed. It's better to post a few dozen great photos by themselves rather than the same good photos hiding among hundreds of not-so-good ones.
10. Don't Forget to Post-Process. Consider using a program like Picasa or iPhoto to organize your photos. Either will allow you to crop, color-correct, adjust exposure, remove red-eye, and perform other basic editing tasks. Performing some very basic editing on a photo can help improve its quality drastically. Cropping a bit can help with composition, and you can also rotate a photo so that horizon lines are straight. Getting your photos right in-camera is the larger goal, but there's no harm in a bit of retouching.
Resource:pcmag.com

12 Tips for Improving Camera Phone Photos

We are living in a time where ‘convergence’ is everywhere. Gone are the days when a camera was a camera, a MP3 player was an MP3 player, a phone was a phone….
These days digital cameras are found in a variety of other gadgets – including cell phones. In fact Camera Phones are one of the fastest growing segments of the digital camera market and with the improvements in the quality of what is being offered in some phones (higher megapixels, better lenses, high capacity storage) some believe that they are beginning to win market share away from the low end offerings of many digital camera manufacturers. Our current poll on ‘take anywhere cameras‘ reveals that many of you are using camera phones regularly.
Unfortunately many of the pictures being taken with Camera Phones are poor in quality. This might partially be a result of lower quality cameras – but it is also often a result of poor photographic technique.
Following are 13 tips for Camera Phone owners to help them get the most from their cameras phones:

1. Light Your Subject Well

The better lit your subject is the clearer your image is likely to be. If possible shoot outside or turn on lights when shooting inside. If you’re turning on lights in a room to add extra light to your shot be aware that artificial light impacts the color cast in your shots and you might want to experiment with white balance to fix it (see below).
Some cameras come with a built in flash or light – this can really lift a shot and add clarity to it, even if you’re shooting outside (in a sense it becomes a fill flash). If your camera doesn’t have a flash or light you should avoid shooting into bright lights as you’ll end up with subjects that are silhouetted.

2. Get Close to Your Subject

One of the most common mistakes with camera phone images is that their subject ends up being a tiny, unrecognizable object in the distance. Camera phone images tend to be small due to low resolution (although this is changing) – so fill up your view finder with your subject to save having to zoom in on the subject in editing it later (which decreases quality even more).
Having said this, getting too close on some model camera phones creates distortion and focusing issues (particularly if the camera phone doesn’t have a macro or close focusing mode).


Camera-Phone

3. Keep Still

As with all digital photography, the more steady your camera phone is when taking your shot the clearer your image will be.
This is especially important in low light situations where the camera will select longer shutter speeds to compensate for the lack of light. One trick is to lean your camera phone (or the hand holding it) against a solid object (like a tree, wall, ledge) when taking shots.
Keep in mind that many camera phones also suffer from ‘shutter lag’ (ie the time between when you press the shutter and when the camera takes the shot can be a second or so). This means you need to hold the camera still a little longer to ensure it doesn’t take a shot as you’re lowering it away from the subject.

4. Edit Images Later

Whilst it can be fun to use your camera phone’s inbuilt editing and effects, editing pictures later on your computer produces much better quality images. Take your shots in color at high resolution to keep your options open on how to treat it later.
You can always make it black and white on your computer, but you can’t make it color if you take it in Black and White mode.

5. Don’t Throw Away ‘mistakes’

Remember that on many phones the quality of the screen will not be as good as your computer’s. So if possible hang onto your shots until you can get them on your PC. You might just find that they come alive on a quality monitor. You’ll also find that even ‘mistakes’ and blurred shots can actually be quite usable (in an abstract kind of way)

6. Avoid Using the Digital Zoom

As tempting as it might be to zoom in on your subject when taking your picture (if you have a zoom feature on your camera phone), if the zoom is a ‘digital zoom’ it will decrease the quality of your shot to use it (you’ll end up with a more pixelated shot)..
Plus you can always edit your shot later using photo editing software on your computer.
Of course some camera phones are beginning to hit the market with ‘optical zooms’ – these are fine to use as they don’t enlarge your subject by enlarging pixels.

7. Experiment with White Balance

An increasing number of camera phones come with adjustable white balance which allows you to modify color balance in your images based on shooting conditions. Experiment with this feature to get a good feel for the impact that it has on your shots. I find that it impacts different camera phones differently. Read your manual to find out how it works on your phone.

8. Take loads of Shots and Experiment

The beauty of all forms of digital photography (including that of camera phones) is the ability to shoot off many shots quickly and without cost. This means you can experiment with different modes and composition and discard those that you don’t want to keep.
Camera phones are particularly good for experimenting with new angles and perspectives – shoot from down low, up high, close up etc and you’ll end up with interesting and fun shots.

9. Follow Rules of Composition (and then Break them)

Learn some basic composition ‘rules’. (for example – the rule of thirds – ie don’t place your subject squarely in the middle of your frame but a third of the way in). Simple tips like this can bring life toyour photos.
But then also remember that the beauty of a camera phone is its ability to break all conventions – some of the best shots around break all the rules. So shoot from the hip, the floor, up high, up close – anything goes.

10. Keep Your Lens Clean

One of the challenges with many camera phones is keeping them maintained and clean. Phones spend a lot of time in pockets, in bags and being used in all manner of weather and conditions. As a result they get dirty and can easily become damaged – fingerprints are a common problem on camera lenses – especially if your phone doesn’t have a lens cover. From time to time clean the lens of your camera using a soft cloth (sunglasses cleaning cloths are great).

11. Observe Camera Phone Etiquette

While there is no formal set of rules for using camera phones– it is worth considering how you use it and what impact it might have upon others. There are many cases of camera phones being abused to take sneaky or voyeuristic photos. Ask permission to photograph strangers, consider restrictions on the use of cameras in places like theaters and concerts etc.
Resource: digital-photography-school

12. Use the highest resolution possible on your camera phone

Some phones allow you to choose what resolution you want to take photos at. It almost goes without saying (but we like to state the bleeding obvious) that the higher your resolution the clearer your shot will be. This is especially true for camera phones which often have sensors of under 1 megapixel in them. Keep in mind however that the higher the resolution the larger the file size of the images you take – this means if you want to send images they can end up taking a long time to send.