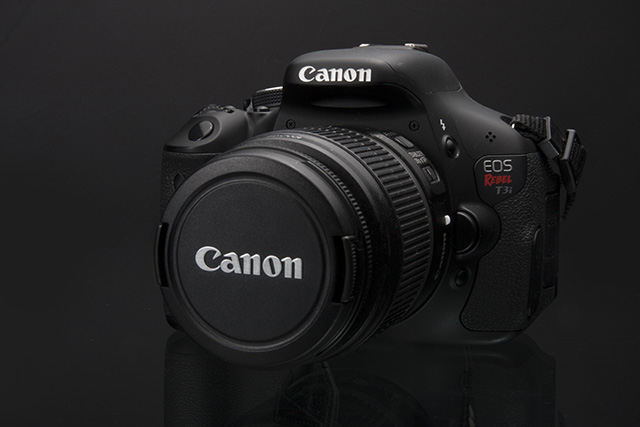
The explosion of filmmaking since its democratization in 2008 has meant increasingly cheap ways of exploring the possibilities of motion pictures. One of the most popular cameras in recent times for beginners to start shooting on is the Canon Rebel series. Today, I'm going to take a look at the basics of getting your Rebel rolling, and provide some ideas on how to improve and develop those first attempts.
I'm going to be using the Canon T3i/600D as the example camera, but the other recent models in the series are largely identical in operation. Not all of my points are going to be Rebel-specific though, so if you have another DSLR, or a M4/3 camera like an NEX, many of the points will still apply to you, you'll just have to adapt them to your camera.
Setting Up to Record, Quickly
Ok, first things first, set your mode dial to video. The camera immediately clicks into live view mode, and the default or last-used settings are up. Let's get the on-screen stuff sorted out first. Hit the menu button to go into the video contextual area of the main menu, so you can set your resolution and frame rate on the second tab under "Movie rec. size."
Set Your Resolution and Frame Rate
Usually this is going to be either 1080p24 or 1080p25/30 (25 in PAL-land, 30 in NTSC-land). If you want a cinematic look, go with 24. If you're shooting for TV or just want to get on with it and shoot some video, stick with the other one.

Controlling Your View
Now you can back out of the menu, and hit INFO until you have a comfortable amount of information on screen. Personally, I like to shoot with everything on-screen, including the histogram for continuous checking of exposure levels.
Initial Settings
Now, if you haven't used the video mode before, it should be set to auto-exposure in video mode, so you're ready to roll immediately. If it's in manual exposure and you're in 1080p24 or 1080p25, set your shutter speed to 1/50th, and if you're in 1080p30, set it to 1/60th. Then set your aperture and ISO to balance the exposure, and focus the lens (to see the options here, skip to the "Focusing" section below). Everything's set, so hit the Live View button to start and stop recording and you're rolling!
That's all there is to getting started in video, but you didn't come here for a short version of the manual. So what should you be thinking about, and what can you do to improve this first video you just shot? How do you add production quality?
Manually Controlling Exposure
Now that you have the camera set up to shoot, it's time to nail exposure. The trick to good video exposure is to use manual exposure and use the histogram. Unfortunately, Canon haven't decided to put a proper waveform monitor into their DSLRs, so there's a tiny bit of guesswork involved. To set manual exposure, go into the menu and literally the first option is "Movie Exposure." Hit SET, and switch it to "Manual." Hit SET again to confirm the option.

ISO
Now your camera is in fully-manual mode, just like M mode in stills. However, where stills eventually gained auto-everything, video has been fully manual since the birth of cinema, so there are plenty of tools and information out there to help with this part if you're new to manual camera use.
I've found that unlike my older 40D, the T3i is fairly amenable to ISO adjustment and it can be used to complete the exposure triangle quite happily. This is especially useful because in video, generally the shutter speed is locked to the closest available shutter speed to the reciprocal of double the frame rate (ie. 1/50th for 24p, 1/60th for 30p) to get the "correct" amount of motion blur.
Aperture
Similarly, aperture is a creative choice about depth of field, so all that's left to adjust once you've set the sensitivity of the camera. When shooting in dim light, ramping the ISO up to 800 or so doesn't tend to significantly impact the look of the video, especially if you can add a light pass of de-noiser in post-production.
Neutral Density Filters
What about if it's too bright, though? What if you're shooting in broad daylight at 1/50th at f/2? You can't turn the ISO down below 100. This is where neutral density (ND) filters come in. Specifically, variable ND filters. If you're moving the camera into the outside from an indoor location in a single take, they get around the limitations of no aperture control with modern lenses or clicky iris rings in older lenses, and can save your footage from completely blowing out.
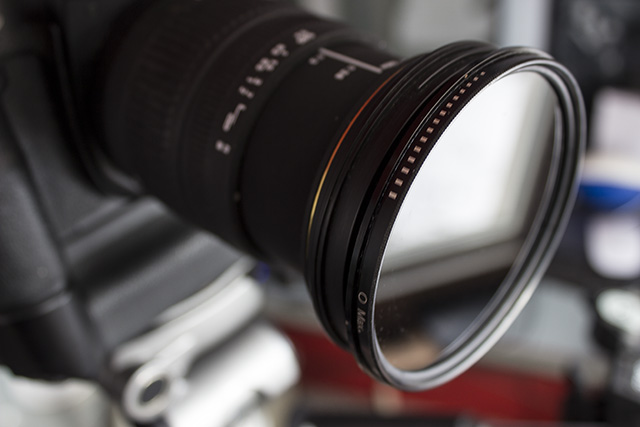
If you're shooting outside, you can usually just set it to maybe four or five stops of ND (the amount you need will depend on the brightness, of course) and shoot away happily at your wide-open settings for the aesthetic you want. Of course, if you want a deeper depth of field to see more of the scene so you're shooting at f/8 or so, then you may only need a 2x ND on there. Experimentation is easy with variable NDs, as you don't need to keep stopping to add or remove ND filters as the light changes.
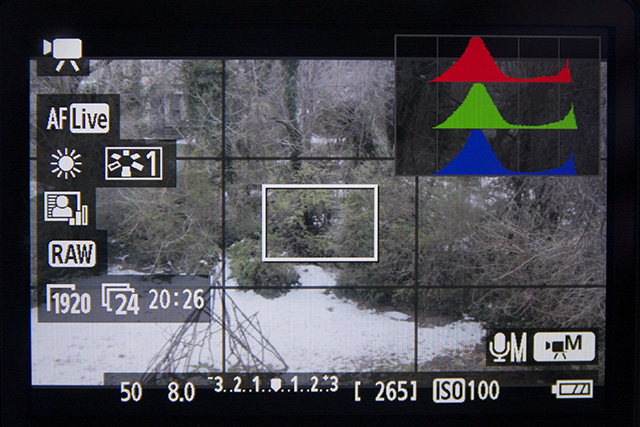
Using the Histogram
Using the histogram on the on-screen display really helps give a more empirical idea of your exposure levels than just guessing from how the video looks. Of course, video isn't RAW, it's baked before the write, so how it looks in-camera will be how it looks on-screen.
This means you can use the screen to judge exposure, but I like having a visual indicator of things I may otherwise miss. I generally want the main spike at around 70% brightness to allow headroom for highlights, although some scenes can be tricky. This is where personal judgement and artificial lighting can come in. When in doubt, I just stick by the rule of holding the highlights and letting the shadows fall where they may.
Digital Zoom
You'll also notice that in the T3i and later, there's a digital zoom option. Most of the time this isn't much use and should be left off, but if you want to extend the range of a long lens, turning the digital zoom on and leaving it zoomed out to 3x (technically 2.7x) essentially gives you a 3x teleconverter built into the camera with no loss of exposure- nor resolution, as the camera crops into the central 1920x1080 pixels of the sensor.

In fact, because there's no downsampling or pixel binning (throwing away pixel data to reduce processing), the quality of this punched-in video is generally a little sharper and contains less moiré than the normal video settings, and because it's only using the central portion of the lens, even lower-quality lenses will work well.
The disadvantages include the depth-of-field effects of the super-35/APS-C size sensor are significantly reduced, and there won't be full color information because of the mechanics of the Bayer pattern filter. Largely, I'd say it's best used for distance-limited things like wildlife, sports and wedding videography when combined with, say, a 70-200mm lens.
Focusing
As I said, there's no continuous AF while rolling (although the T4i and T5i both have the option, it doesn't work great), so you end up with two options.
Fixed Focus
First, set your focus before shooting and maintain the same camera-to-subject distance at all times. This is most useful for interview-type scenarios, where the subject is sitting and the camera is locked on them.
Manual Focusing
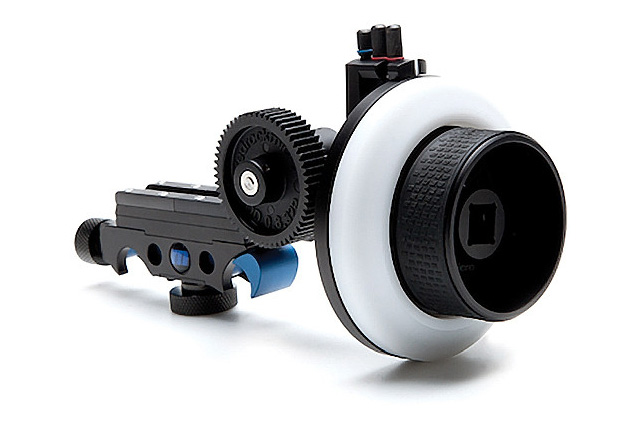
The other option is continual manual focus, regularly used in filmmaking, where frequently both camera and subject are moving around.
As a beginner, you can just use the normal focus ring, or maybe attach a ziptie or jar opener or something to make more precise movements with it. If you continue heavily with the video side of things, you may wish to invest in a follow focus, which is a geared knob that attaches to the side of the lens and grips the focus ring to allow for easy, precise focus pulling without the possibility of jerking the lens.
Checking Your Focus
To check your focus, never zoom in and out with photography lenses. They don't maintain the same focus point throughout their zoom range at any given focus ring setting, and you'll end up with blurry footage. On the Rebel, you can digitally zoom in 5x or 10x with the top-right thumb-control button. This allows critical focus on wherever you put the zoom box on screen. Bear in mind the button is a toggle; it goes 5x, 10x, 0x, in order. You can't punch into 5x and then use the Exposure Lock button to punch back out again.

Auto Focusing Tip
A little trick to help with focusing on the T3i before shooting if you're not in too much of a hurry is to put the lens on AF, move the focus box over your subject, and half-depress the shutter button. This method is a little slow, but accurate. If you're not comfortable with manual focus, this is the easiest way to focus.
You can even do it while recording, although you'll lose a few seconds of video while it brightens the scene and the lens hunts back and forth. In order to focus this way you'll need to enable "AF w/ shutter button during video" which is on the first tab of the menu. As long as the subject is mostly static, it should be ok. With moving subjects, manual focus is a necessity.
Resource: photography.tutsplus.com/
Không có nhận xét nào:
Đăng nhận xét